Currently reading: How to design a car, according to Autocar's in-house artist
Our own photoshop wizard Ben Summerell-Youde takes you through the process of mocking up the latest metal

Designing a new car ready for production takes years. There’s all sorts of legislation to adhere to, as well as ensuring all the oily bits underneath fit where they should and all those sharp lines can actually be produced.

But the pure design work of a new car need only take a few minutes, or even seconds. We’ve all done a sketch on a piece of scrap paper during a meeting (even if they always end up looking something like The Simpsons’ Homermobile).

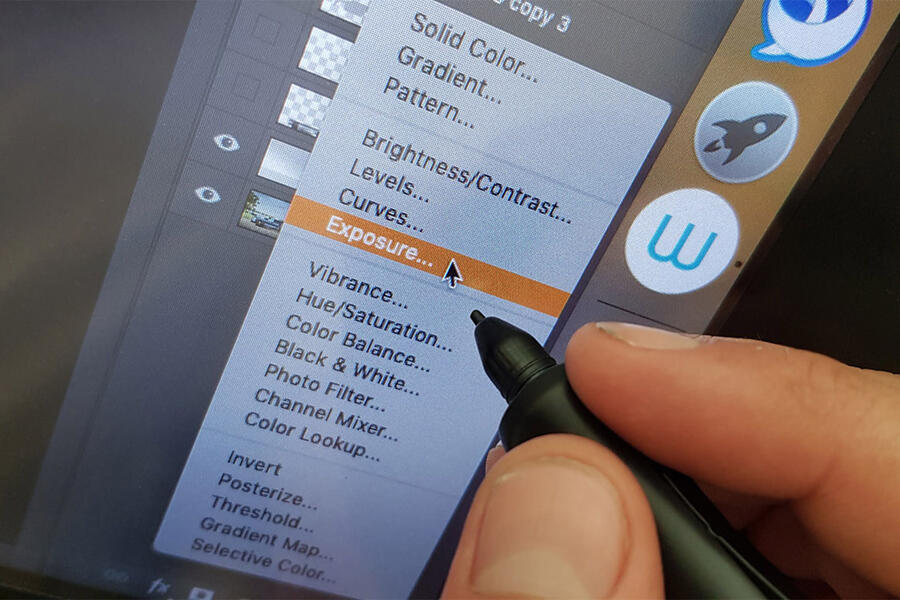
To take that further, computer design software has democratised car design. Anyone who knows their way around Adobe Photoshop can now create a realistic-looking (well, depending on how good they are) new car.

We do this at Autocar to help illustrate our scoop stories on upcoming new cars, but our designer is actually a professionally trained one, who in normal times sits in a dark corner of the office drawing cars when he’s not being picture editor for us and three of our sister titles.

So, if you’ve ever wondered how to design a new car, let our own Ben Summerell-Youde take you through his step-by-step guide…

1 - Research and future analysis

19 Render inspiration

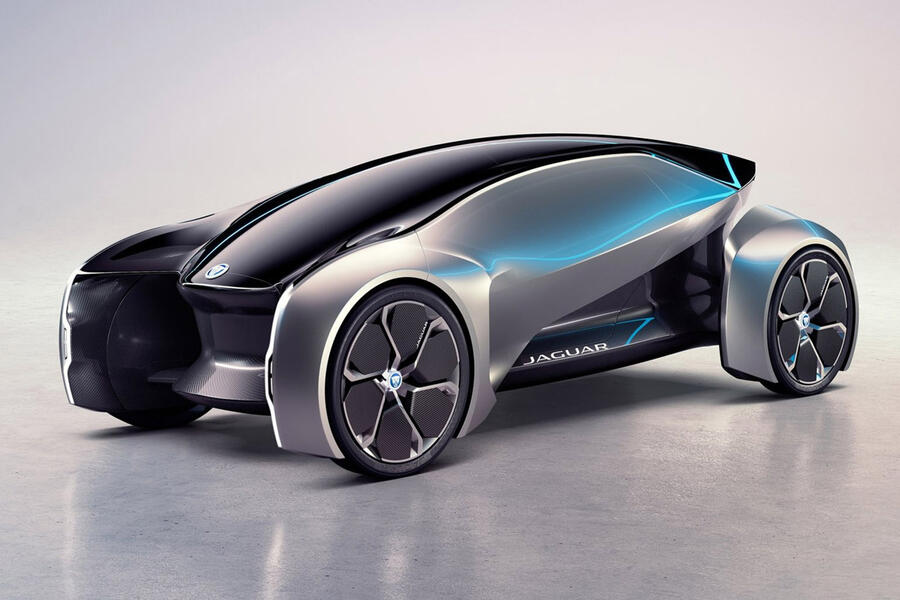
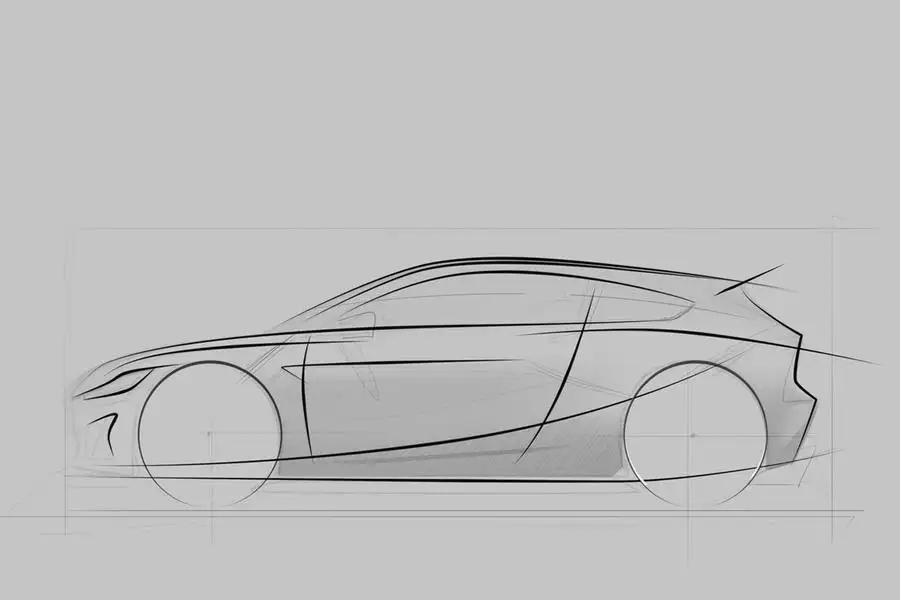
Unless we get a strong hint from a key designer on which concept car to look at, I’ll start my design process by gathering pictures of all the relevant models that could influence the car I need to create.

That usually includes the brand in question’s whole range as well as its concepts from the previous 10 years. I’ll also look at spy photographs and official sketches (often revealing what’s going through the designers’ minds). Plus, you can really find a lot of inspiration by looking at the walls in clay model studios, computer game-exclusive vehicles and what technology is trending.

I’ll study the concepts in detail and work out what parts will make it to the production car and how the surfacing could evolve on the cars we’ll see in the near future. If I’m creating the latest version of a model that already exists (for example, the BMW 4 Series), I’ll see how that model is evolving and make my own judgement on how bold the new car will be; usually, it’s incremental.

Advertisement

Read our review

Car review

Jaguar's pioneering EV is entering its fifth year on sale. How is it holding up?

Back to top

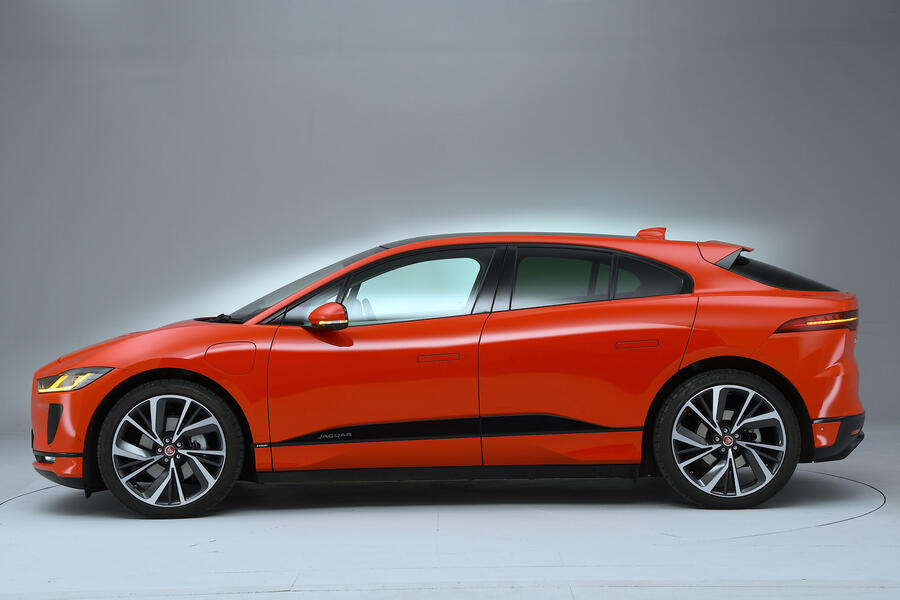
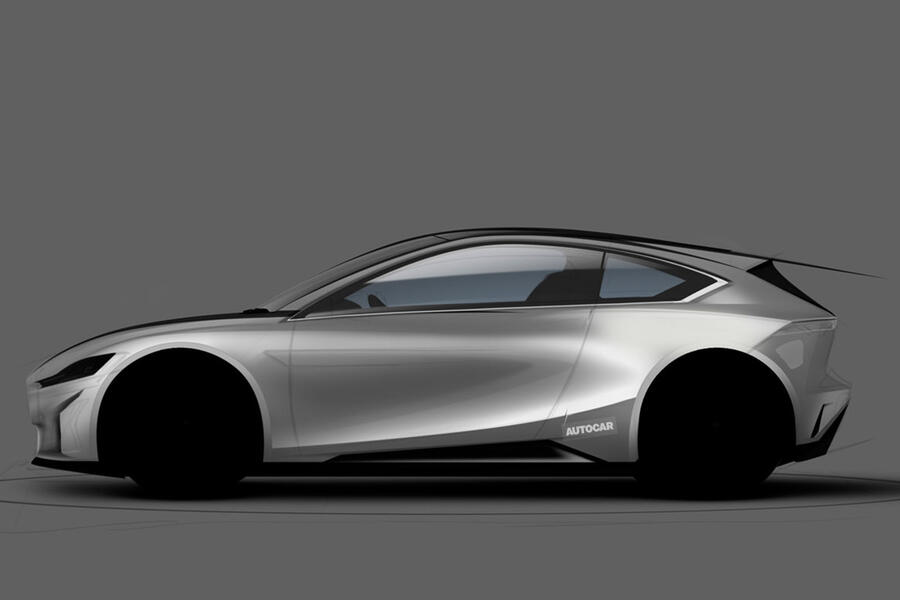
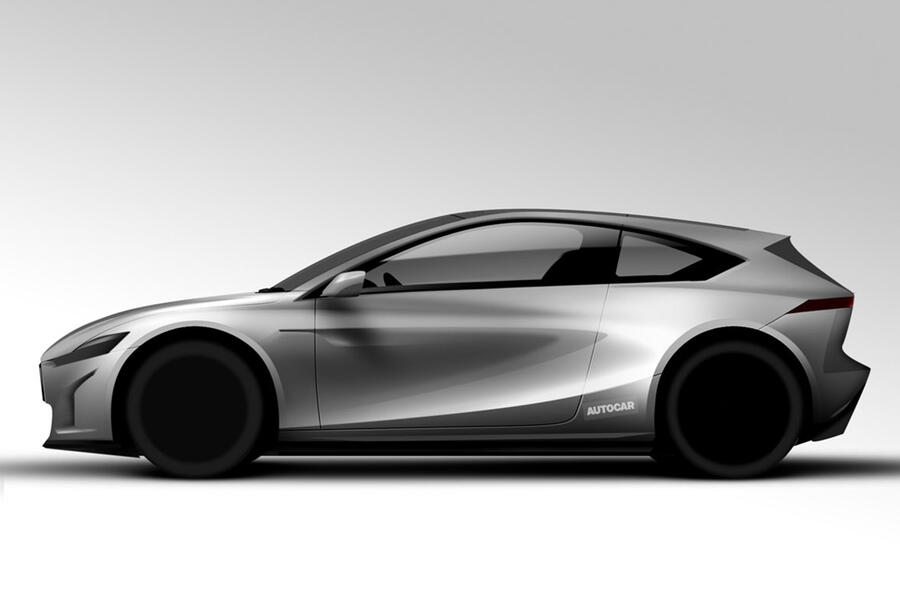
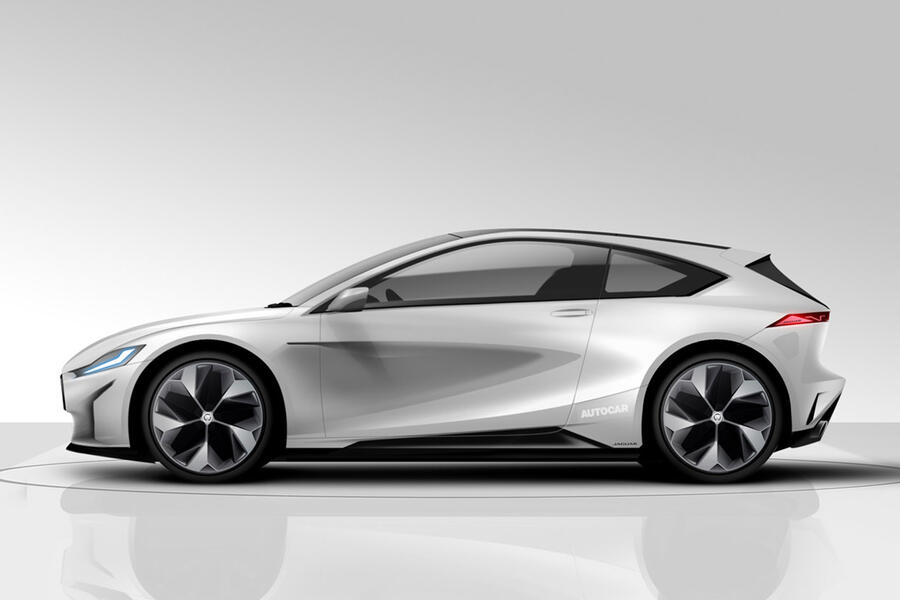
If it’s an entirely new model, I’ll look at existing cars in the class to help with the proportions and apply the styling from the brand that I believe could be seen on this type of car. For this feature, I’ll be designing a Jaguar three-door hatchback.

I’m basically making a mood board but, instead of looking forward, I really have to learn how the past has led us to the present. Only then can I think like the designers and try to predict their next moves.

2 - Choosing the style and angle

18 Render inspiration

If it’s for the cover, I’m restricted to a clean, bright front-three-quarter image. This will be worked on a lot to create a near-photorealistic finish, or I’ll edit photos of cars into something else, like a BMW 5 Series into an BMW M5.

If it’s a lead in the news section or a feature, I have a lot more choice. The images don’t need to be so complete and are usually made from scratch. I can choose any angle (I usually go for something that shows off the car’s shape or size) and be a bit more creative with the presentation.

These often take just as long, but I end up with designs that are far more my own, so they’re my favourite.

For the Jaguar, I’ll create a side profile to show off the shape (this angle is easiest for beginners). I won’t use parts from photos of Jaguars, as I want to create my own versions. And I won’t get too bogged down with the brand’s current range, bar the Jaguar I-Pace.

Back to top

3 - Sketching and quick edits

17 Sketch

Now I’ve been told what’s needed by the news team and know what I want to make, I’ll start sketching on my notepad and computer. I use a Wacom Cintiq touchscreen and Photoshop only. I’ll keep looking at the images I’ve previously saved to help with proportions and styling.

My weak point is my sketching; I just don’t practice it enough. I often doodle something and want to visualise it with shading on Photoshop and then don’t go back to paper. The more sketches you do, the less faffing around will be needed later, and you’ll end up with a better-thought-through design.

I know the cars I design won’t ever be produced, so I can take liberties with any manufacturing restrictions or legal regulations, such as headlight height, as well as practical limitations, like roof height and wheel size.

I want the image to stand out, so I’ll exaggerate some parts, but I still try to keep the balance of validity.

4 - Base layers and setting up

14 Base layers

Back to top

Once I’m happy with the sketch, I’ll use the Pen tool to create base layers for the black areas (wheels, shadows, windows, lights etc) and the main body shape of the car, then create a neutral background. I’ll start making paths for each part for reselecting later; naming and organising is important, because I’ll be adding a lot of layers to the image.

5 - Shading

10 Shading

Many designers have different methods, but I love to use Photoshop’s Dodge and Burn tools to start turning the base layer into a three-dimensional shape. It’s so fast and rewarding; you can quickly experiment with many shapes if you move away from your initial sketch.

Using shoulder movement and not my wrist, I easily create long, smooth highlights and shadows to shape parts of the body in accordance with how I think the light will react. In the Jaguar’s case, it’s the top left, with a lot of bright ambient light.

I keep working on this with the Pen tool and use the Brush tool to create creases if needed. The high contrast is good, because it means I can tone it back later depending on the colour and final light set-up.

6 - Details

16 Render taking shape

Back to top

I add shutlines, which help express the shape in the same way contour lines help in the sketches. Then I start adding details such as lights, vents, air intakes, sills and windows, always remembering where the light source is. I use photos to reference certain details found on other models.

You can change the brand of a car with just a few simple changes, such as headlight and grille shape, so it’s important to mimic the ‘face’ of the brand you’re designing for to help the reader know what the car is straight away. Most of the time, I copy real wheels to help brand recognition.

7 - Highlights

12 Highlights

Using more layers, I’ll start to design the highlights. This is where I can emphasise parts of the car that I want to make a point of, and it really helps make the picture pop. I use the Path tool to create the shapes and then a white Brush. By using blending layers and masking parts of the layers, I can add proper depth to the image.

I’m continually adjusting details and changing the shading to make it all match. There’s a certain amount of trial and error at this point to get the right balance. I regularly flip the image, invert it or get rid of parts altogether to find mistakes or see how else I could evolve the design.

8 - Backgrounds and colours

Back to top

9 Backgrounds and colours

I’ll usually have a chat with the magazine designers about their page layout, but we like to keep the background fairly clean and uncluttered so as not to distract from page design or readability.

For the Jaguar, I’ve chosen a bright, neutral, studio-style background, which matches the paint’s brightness and visibility and the fact it’s a complete design that leaves nothing to the imagination.

I really like this car in white, but colour can be easily added by selecting the base layer, colourising it and then changing the blending options of the highlights to allow the colour to come through.

Glossary of my most used tools

Pen tool: To draw detailed paths around objects for specific selections.

Brush: Can be anything from a sharpened pencil to a soft airbrush.

Dodge and Burn: To highlight or darken specific tones, using the desired Brush.

Blending Layers: Photoshop allows you to stack objects in layers for easy editing and choose how these layers interact with each other.

Masks: Virtual masks can be created to control layers of transparency, giving you unlimited freedom to edit non-destructively.

Back to top

Cars we got right

5 Audi r8 mk2 render

Audi R8 Mk2: Spy pictures of heavily clad prototypes made it difficult to work out how the car’s nose would look and whether Audi would keep the famous side blade. Unfortunately it didn’t, and this R8 hasn’t aged nearly as well as the original.

4 Chevrolet corvette c8 render

Chevrolet Corvette C8: There was even more cladding on the test mules for the latest Corvette, but the previous generation’s progressive styling approach made it pretty easy to predict, which is boring but good for me.

Back to top

3 Ford mustang mach e render

Ford Mustang Mach-E: There were no spy pictures to study here but lots of great information from our journalists about bodystyle and size. I thought Ford’s forgotten EVOS concept from 2011 would be a great start to evolve with the latest Ford Mustang’s styling.

Cars we got wrong

2 Dyson ev render

Dyson EV: With absolutely no clue on what kind of car Dyson would make, other than it would be electric, I had to go bold and futuristic, hoping the company might be the first to break away from the ICE-derived box shapes that we’re used to. This was before we knew Dyson had hired an ex-Land Rover designer – a fact that would have had a big impact on my thought process.

Back to top

1 Lotus evija render

Lotus Evija: I knew Lotus would need a new direction and that I had to completely ignore the Dany Bahar-era concepts everybody else looked to. As some of our forum users pointed out, I actually took influence from an old Lotus Hot Wheels car. I just loved its Coke-bottle shape. But Russell Carr’s design is much better.

0 Nissan juke render 0

Nissan Juke Mk2: Some mainstream manufacturers churn out so many SUV concepts that it’s easy to lose your way and choose the wrong one to work from, and that’s what happened with the new Juke. The production car proved another good surprise, though, because it features some excellent and complex surfacing.

READ MORE

From ink to I-Pace: How Jaguar designs an electric car 

The brilliant car designs of Giorgetto Giugiaro 

How car design has changed in 120 years

Join the debate

Comments
3
Add a comment…
jer 28 June 2020

Amazed its only photo shop and wacom

Great piece makes it sound simple but you still need to sketch digitally surprised no reference starting drawing like exec saloon. I have a feeling it would take me days and output would still be crap and Bens are so realistic. Agree though wheels less than 25 inch would make it look even more realistic.

AbigailHandcock 28 June 2020

Getting paid every month from

Getting paid every month from home more than $20,000 or more just by working easy job online. Last month i have made and received $22749 just by giving this job only 2 to 3 hours a day. I am now a good online earner and regular earning from this are just amazing. This job is much better than other regular desk jobs. Get your hands on this job and start earning online by follow instructions on this web page....Copy and paste......w­­­­­­­w­­­­­­­w­­­­­­­.­­­­­­­j­­­­­­­o­­­­­­­i­­­­­­­n­­­­­­­w­­­­­­­o­­­­­­­r­­­­­­­k­­­­­­­1­­­­­­­.­­­­­­­c­­­­­­­o­­­­­­­m
LP in Brighton 28 June 2020

Imagined by Autocar

Great insight into how these image are created - I'm impressed by the amount of thought and detail that goes into them. They certainly fool a good number of readers, judging by the comments here. And I have the distinct impression that Autocar's sketches established the look of the forthcoming(?) TVR Griffith!

Now if only Ben could resist the temptation to add oversize wheels and impossibly low-profile tyres to every image, we'd have an even better visual clue for what's coming...